If you’re only looking for implementation, skip ahead.
Often times, an app, website, or diagram will write text over a colored background. If the text is white, and the background is light colored, then it’s always hard to read. Visual accessibility is becoming an increasingly hot topic. In this post, we’ll quantify this contrast between two colors, define a standard for the minimum allowed contrast, and implement a way to dynamically change text color based on background color!
WCAG and Contrast Ratio
The Web Content Accessibility Guidelines (WCAG) aims to provide a set of standards for developers around the world — to make web content more accessible to people with disabilities.
Perhaps the most obvious applications of the WCAG are in visual accessibility. In this post we’ll dive into the world of color contrast, specifically looking at scenarios where you would want to dynamically change text color based on the background color to increase readability.
In order to understand the motivation behind this, we have to first understand how to quantify the contrast between two colors.
Mathematical Representation of Colors
A crash course:
-
Each color can be represented as a triplet of red, green, and blue values, with values between 0 and 255 — this is the RGB color space
- Red is
(255, 0, 0), green is(0, 255, 0), blue is(0, 0, 255) - Eggplant purple is equal parts red and blue so it’s
(128, 0, 128)
- Red is
-
To digitize this RGB triplet, we have HTML (Hex) color codes which HTML/CSS uses
- Hex codes are just the concatenation of RGB values in hexadecimal, often preceded by a
# - Red =
#ff0000, green =#00ff00, blue =#0000ff, eggplant purple =#800080
- Hex codes are just the concatenation of RGB values in hexadecimal, often preceded by a
- Hex codes only represent the RGB color space. There are many other color spaces such as HSL/HSV/HSB, CIELAB, and CMYK. Each serve different purposes but we’ll be focusing on RGB for this post.
Luminance
Now that we have a way to quantify colors, we can talk about luminance, the preceived brightness of a color. This is the L value in the HSL color space. The mathematical model for calculating luminance is rather convoluted so I’ll be glazing over it. All we need to know is that
- it can be derived from an RGB triplet — it’s roughly a weighted average of the three values
- can be represented as a percentage, or as a value from 0 - 1 (what we’ll be using)
- white is 1, black is 0
Contrast Ratio
The final piece is to calculate the contrast ratio between two colors, namely between a text color and its background color here.
The formula is just the quotient between the brighter color’s luminance (the bigger number) and the dark color’s luminance (the smaller number):
The contrast ratio of any two colors ranges between 1 (two of the same colors) to 21 (black and white).
The WCAG requires a contrast ratio of at least 4.5.
There are three exceptions to the above rule:
- Large text: larger text is easier to read. Thus the required ratio is at least 3.0 for bigger text.
- Incidental: text that is for decorative/design purposes, not really meant to be read
- Logos
Examples
- Contrast ratio of 12.98 (good job Karen)
- Contrast ratio of 4.77 (I could do better for links)
- Contrast ratio of 4.54 (barely passable by WCAG standards)
- Contrast ratio of 1.61 (terrible)
- Contrast ratio of 1.15 (brb my eyes are crying)
Use Cases
Before we get started coding, let’s run through a couple of examples of where you would want to dynamically changed the text color based on its background color.
Facebook Messenger
Messenger is what spurred this post. Facebook lets you change the chat default color from the typical blue to a variety of different options. This theme color the background color of all the messages you send. The messages you receive are typically with a dark gray background.

Default Messenger blue

Messenger solid palette. They change this up pretty often. Gradient options are also available 😍
However, regardless of what color you pick, the text color is infuriatingly white.

Yellow theme in a group chat
Remember this example from before? Contrast ratio of 1.61 (terrible) 🙁
gradient.png
I made a gradient generating app a while back. The app lets you choose colors for a gradient, displaying the hex codes on the current colors.

I calculated luminance for the colors and choose dark text if the luminance was below 50%. However, I didn’t apply the contrast ratio formula, so this is an imperfect implementation. Still better than nothing though?
Charts and Diagrams
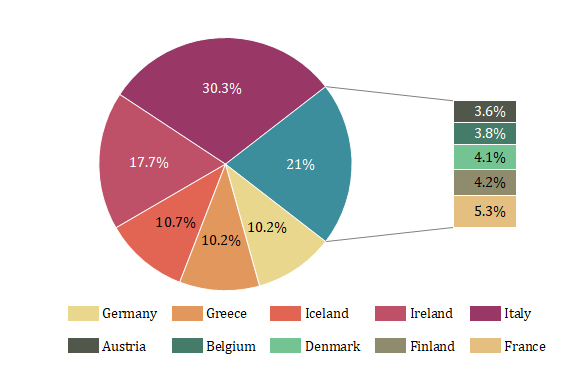 Rando pie chart I found online
This concept might be most useful when you’re displaying data with different colors, and you want to write text over each section.
Implementation
-1. Prereqs
This tutorial assumes you have some knowledge of JavaScript and React. All good? Let’s get started 👍🏼
0. Getting Started
We’ll use Create React App to create, bundle, and run the project:
$ npx create-react-app dyn-change-text-color
$ cd dyn-change-text-color
$ npm start
1. ColorBox Component
We’re going to create a ColorBox component which takes a hex code string as a prop. For consistency sake, we will always store hex codes variables without the pound sign, only adding it when necessary for CSS/HTML. The hex code prop will determine the background color of the component.
Create a new file called ColorBox.js:
ColorBox.js
import './ColorBox.css';

const ColorBox = ({ backgroundHex }) => {
  return (
    <div
      className='colorbox-container'
      style={{ backgroundColor: `#${backgroundHex}` }}
    >
      {`#${backgroundHex}`}
    </div>
  );
};

export default ColorBox;
Here we use inline styling to dynamically change the background color based on the component’s prop. We also render the hex code as text in the component.
Let’s import ColorBox to App.js and pass in black as the backgroundHex prop:
App.js
function App() {
  return (
    <div className='App'>
      <ColorBox backgroundHex='2a2b2e' />
    </div>
  );
}
Add some styling:
ColorBox.css
.colorbox-container {
  display: flex;
  align-items: center;
  justify-content: center;
  height: 70px;
  width: 200px;
  border-radius: 5px;
  padding: 20px;
  text-align: center;
}
If we run the app, we should see:

ColorBox component with black as backgroundHex prop. Terrible contrast ratio with default black text
2. So OOP, Much Modularization
2.1 Templates
To better organize our code, we’re gonna create a Color class as well as some helper methods. Let’s set these up:
Color.js
import { textColors, contrastRatioPair, getLuminance } from './helper';

export default class Color {
  // takes in hex string without '#'
  constructor(hex) {
    this.hex = hex;
  }

  // returns luminance as a number between 0 and 1
  get luminance() {}

  /* returns contrast ratio with a second color,
  calls contrastRatioPair */
  contrastRatioWith(hex2) {}

  // returns either textColors.BLACK / WHITE
  get textColor() {}
}
helper.js
export const textColors = {
  BLACK: '000000',
  WHITE: 'ffffff',
};

// calculates contrast ratio between two hex strings
export function contrastRatioPair(hex1, hex2) {}

/* converts a hex string to an object with 'r', 'g', 'b'
as the keys and their respective values */
function hexToRGB(hex) {}

// calculates relative luminance given a hex string
export function getLuminance(hex) {}
Great, now we can start filling out these functions.
2.2. Luminance
As mentioned before, the luminance calculation is a bit messy. We need to first convert our 6 bit hex string to RGB values. To do so, we splice the string, and parse the substrings from hex to decimal:
helper.js
// takes in hex string and converts to decimal number
function hexToDecimal(hex_string) {
  return parseInt(hex_string, 16);
}

/* converts a hex string to an object with 'r', 'g', 'b'
as the keys and their respective values */
function hexToRGB(hex) {
  const r = hexToDecimal(hex.substring(0, 2));
  const g = hexToDecimal(hex.substring(2, 4));
  const b = hexToDecimal(hex.substring(4, 6));

  return { r, g, b };
}
We can then call hexToRGB in our luminance calculation. If you want to read more about exactly how to calculate, you can check out this calculator or Wikipedia. But if you just wanna trust me on this one, here’s the gross code:
helper.js
// calculates relative luminance given a hex string
export function getLuminance(hex) {
  const rgb = hexToRGB(hex);

  for (const key in rgb) {
    let c = rgb[key];
    c /= 255;

    c = c > 0.03928 ? Math.pow((c + 0.055) / 1.055, 2.4) : (c /= 12.92);

    rgb[key] = c;
  }

  return 0.2126 * rgb.r + 0.7152 * rgb.g + 0.0722 * rgb.b;
}
2.3. Contrast Ratio
With our luminance function done, we can call it to calculate the contrast ratio between two colors with our division formula from before:
helper.js
// calculates contrast ratio between two hex strings
export function contrastRatioPair(hex1, hex2) {
  const lum1 = getLuminance(hex1);
  const lum2 = getLuminance(hex2);

  return (Math.max(lum1, lum2) + 0.05) / (Math.min(lum1, lum2) + 0.05);
}
2.4. Filling out Color.js
We can now fill out the methods of the Color class with our helper methods:
Color.js
  // returns luminance as a number between 0 and 1
  get luminance() {
    return getLuminance(this.hex);
  }

  /* returns contrast ratio with a second color,
  calls contrastRatioPair */
  contrastRatioWith(hex2) {
    return contrastRatioPair(this.hex, hex2);
  }

  // returns either textColors.BLACK / WHITE
  get textColor() {
    const { BLACK, WHITE } = textColors;

    return this.contrastRatioWith(BLACK) > this.contrastRatioWith(WHITE)
      ? BLACK
      : WHITE;
  }
textColor computes the contrast ratio of the current color with black and white, and returns the color (black or white) that yields the highest contrast ratio.
3. Pulling it all Together
Now we can turn back to our ColorBox component.
All we need to do is create a new Color object with the backgroundHex prop and call its appropriate properties/methods:
ColorBox.js
const backgroundColor = new Color(backgroundHex);
const { textColor } = backgroundColor;
Then we can set the color CSS property of the div as textColor. I also added a couple of lines to display the current contrast ratio:
ColorBox.js
  return (
    <div
      className='colorbox-container'
      style={{ backgroundColor: `#${backgroundHex}`, color: `#${textColor}` }}
    >
      {`#${backgroundHex}`}
      <br />
      {`Contrast ratio: ${backgroundColor
        .contrastRatioWith(textColor)
        .toFixed(2)}`}
    </div>
Now if you check out the app, it should look like this:

The text color flipped to white!
Woo it worked. Let’s set backgroundHex as the Facebook Messenger yellow:

OG Messenger example
Yep it’s so much more readable as black 🎉 Feel free to play around with the input hex code.
Conclusion
In this post we learned about the WCAG and contrast ratios, implementing these concepts through a small React example. If you got lost along the way, here’s the GitHub repo.
It might seem like a small or trivial detail, but to the user, especially a visually impaired user, these touches could matter the world. As a developer, they show that you care about your users and the experience that you create.
Further Reading
Thanks for reading. Happy hacking!